
- 1 1. Introduction
- 2 2. Basics of User Management and Switching in Ubuntu
- 3 3. How to Switch Users via the GUI
- 4 4. Switching Users via the Command Line (CLI)
- 5 5. Managing Users in Ubuntu (Add, Delete, Modify)
- 6 6. FAQ (Frequently Asked Questions)
- 6.1 6-1. What Is the Difference Between su and sudo? Which Should I Use?
- 6.2 6-2. Can I Switch Users in the GUI Without Entering a Password Every Time?
- 6.3 6-3. How Can I Switch Users in SSH Without Using sudo?
- 6.4 6-4. Why Does “Authentication failure” Appear When Running su?
- 6.5 6-5. Can I Recover Data After Deleting a User?
- 6.6 6-6. Summary
- 7 7. Conclusion
1. Introduction
What Is User Switching in Ubuntu?
Ubuntu is a multi‑user Linux distribution that allows multiple users to share a single PC or server. Therefore, the ability to switch user accounts is widely used across personal environments, corporate systems, educational facilities, and development environments.
By switching users, it becomes possible to maintain individual work environments without affecting other users’ data or settings, enabling safe and efficient workflows.
When Should You Switch Users in Ubuntu?
There are several scenarios where switching users in Ubuntu becomes necessary. Below are common examples.
1-1. When Sharing a PC at Home
If Ubuntu is being shared among family members, each person needs to switch to their own account to keep individual desktop settings and preferences. For example, separating accounts for parents and children allows clear boundaries between work and study environments.
1-2. In Companies or Educational Institutions
In schools or businesses, it is common for multiple employees or students to use a single PC. In such environments, switching user accounts is essential to preserve personal data and settings for each user.
Additionally, system administrators must use privileged accounts (root access), making user switching necessary for management tasks.
1-3. Switching Users for Server Management
On Ubuntu servers, it is common to run applications or services under specific user accounts. For example:
- Log in as a general user → switch to administrator only when required
- Switch to a specific user to manage particular system services
In these cases, user switching via the command line (CLI) is frequently used.
1-4. Using Multiple Users in a Development Environment
Developers may switch users to test software under different environments. For example:
- Perform normal development tasks using a standard user
- Test application behavior under another user account
- Execute administrative operations using the root user
Especially when different permission levels are involved, switching users is crucial for verification.
What This Article Covers
This article explains how to switch users in Ubuntu using both the GUI (Graphical User Interface) and the command line (CLI). It also provides detailed explanations of the differences between sudo and su, user switching in SSH environments, and troubleshooting common errors.
2. Basics of User Management and Switching in Ubuntu
Ubuntu as a Multi‑User System
Ubuntu, being a Linux‑based operating system, supports a multi‑user architecture. Each user is assigned a unique account, allowing them to manage separate settings and data independently.
Separation of User Environments
In Ubuntu, each user has an individual environment that includes the following:
- Home directory (e.g.,
/home/username/) - Configuration files for personal application settings
- Permissions and access control for files and executable commands
- Running processes tied to each login session or background task
This system ensures that multiple users can operate on the same Ubuntu installation without interfering with one another’s environment.
Types of Users in Ubuntu
Ubuntu defines several user types. Understanding these roles helps administrators manage and switch accounts appropriately.
Standard Users
Standard users are regular accounts intended for everyday operations.
- Restricted from installing software or modifying system‑wide settings
- Cannot access other users’ data without proper permissions
- Manages personal files, applications, and settings
Administrator Users (sudo Group)
Administrator users can temporarily elevate privileges to root using the sudo command.
sudoallows installation of software and modification of system configurations- The first account created during Ubuntu installation is typically granted
sudoprivileges
Check users with administrator privileges
getent group sudo
This command lists all users who belong to the sudo group.
Root User
The root user is a superuser with unrestricted access to the entire system.
For security reasons, Ubuntu disables direct root login by default.
- It is recommended to obtain root privileges temporarily using
sudo - Use
sudo suorsudo -ionly when necessary to start a root shell
Enable the root user (not recommended)
sudo passwd root
Once a root password is set, you can log in directly using su. However, enabling root login poses security risks and should be avoided unless absolutely required.
Key Considerations When Switching Users
There are multiple ways to switch users in Ubuntu, and the appropriate method varies depending on the system environment and purpose.
Switching via the GUI
If you are using a desktop environment, GUI-based switching is the easiest method.
- Switch from the lock screen
- Log out and sign in as another user
- Use the system settings menu
The GUI-based process is explained in detail in Section 3: Switching Users via the GUI.
Switching via the CLI (Command Line Interface)
To switch users from the terminal, you will mainly use su or sudo.
su Command
Switch to another user:
su [username]
Switch to the root user:
su -
This maintains the current shell but enters another user’s environment.
sudo Command
Execute a command temporarily with administrator privileges:
sudo [command]
Switch to the root user:
sudo su
or
sudo -i
Detailed command-line operations are explained in Section 4: Switching Users via the CLI.
Session Persistence and Switching Effects
- With GUI switching, the previous user’s session remains active and applications continue running
- With CLI switching, a new session is created without affecting existing processes
- When using
su, environment variables may carry over; usesu -to reset the environment
Summary
- Ubuntu supports multiple independent user environments
- Three types of users exist: standard users, administrator users (sudo), and the root user
- Users can be switched via the GUI or CLI
- The ideal switching method depends on system purpose and environment
3. How to Switch Users via the GUI
In Ubuntu’s desktop environment, you can easily switch users using the Graphical User Interface (GUI). This method is intuitive and ideal for beginners who prefer not to use the command line.
This section explains two primary methods: switching users from the lock screen and logging out and signing in as another user.
3-1. Switching Users Using the Lock Screen
Ubuntu allows you to switch to another user while keeping the current session active. This feature is useful when sharing a PC with family members or when an administrator needs temporary access to another account.
Steps to Switch Users from the Lock Screen
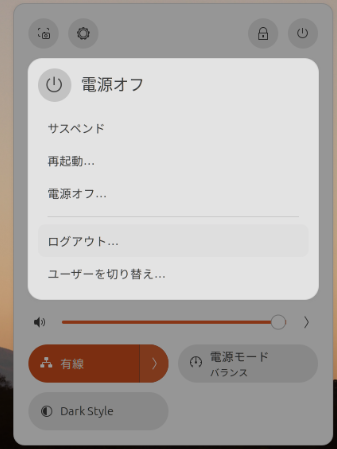
- Click the system menu in the upper-right corner of the screen (power icon).
- Click “Lock”.
- The current session will be locked and preserved.
- Select “Switch User” on the login screen.
- Choose another user and enter the password to log in.

The “Lock” button

Bottom-right option: “Switch User”
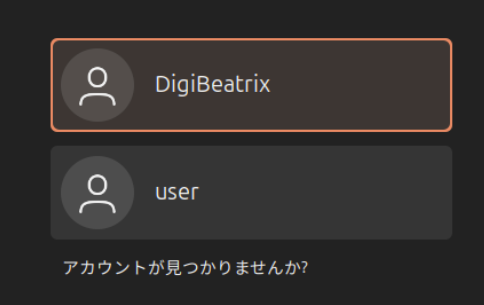
Select the new user.
Benefits of Using the Lock Screen
✅ The previous session remains active
✅ Applications and tasks stay open
✅ Ideal for temporary access or quick switching
However, if multiple users stay logged in simultaneously, memory consumption increases. On systems with limited RAM, performance may degrade.
3-2. Logging Out and Signing In as Another User
Unlike the lock‑screen method, logging out completely terminates the current session before switching users. This affects active applications and unsaved data.
Steps to Switch Users by Logging Out
- Open the system menu in the upper‑right corner.
- Click “Log Out”.
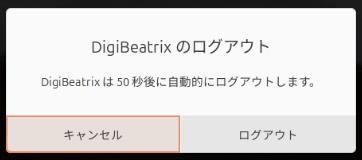
- Confirm the logout in the dialog box.
- The login screen appears.
- Select another user and enter the password.
Advantages and Disadvantages of Logging Out
👍 Applications and processes terminate, freeing memory
👍 Better for systems with limited resources
❌ Unsaved changes may be lost
❌ Apps must be reopened after switching
3-3. Important Considerations When Switching Users
Performance Impact
- Lock‑screen switching keeps previous sessions alive, consuming memory
- Low‑spec PCs may slow down with multiple sessions
- Resource‑heavy applications like video editors or virtual machines may cause performance issues
Saving Data Before Switching
- Always save unsaved work before switching
- Auto‑save features are helpful, but manual saving is recommended
- Pay special attention to browser tabs and text editors
3-4. Summary
- Ubuntu allows easy GUI‑based user switching
- Lock‑screen switching preserves sessions and applications
- Logging out terminates the session and frees system resources
- Use the appropriate method based on memory usage and workload
4. Switching Users via the Command Line (CLI)
In Ubuntu, you can easily switch users using the Command Line Interface (CLI). This method is especially essential when working in server environments or remote access sessions (SSH), where the GUI is not available.
This section covers the su command, the sudo command, and switching users in SSH environments in detail.
4-1. Switching Users with the su Command
The su command (Switch User) is used to switch from the current user to another user account. By entering the target user’s password, you gain access to that user’s environment.
Basic Usage of the su Command
To switch to another user:
su [username]
Example:
su john
You will be prompted to enter the password of the target user to complete the switch.
Switching to the Root User
To switch to the root user:
su -
or
su root
The root user has full permission to operate the system, so use it carefully to avoid critical mistakes.
Difference Between su and su -
The su command has two usage patterns: su and su -.
| Command | Behavior |
|---|---|
su [username] | Switches user while retaining current environment variables |
su - [username] | Starts a new login session, resetting environment variables |
The recommended option is su -, as it properly loads the environment variables (PATH, shell config, etc.) for the new user.
Important Notes When Using su
- You must know the password of the target user to use
su. - For administrative tasks, using
sudois safer and preferred. - Do not stay as root longer than necessary. When done, exit the session using:
exit
4-2. Switching Users with the sudo Command
The sudo command (“Superuser Do”) allows a user to execute commands temporarily with administrator privileges.
Unlike su, sudo does not require knowledge of the target user’s password—only the current user’s password is needed, provided that user belongs to the sudo group.
Using sudo for Administrative Tasks
Run a command with temporary elevated privileges:
sudo [command]
Example:
sudo apt update
Here, you will be asked for the current user’s password, not the root password.
Switching to the Root User Using sudo
If you need root access for a shell session:
sudo su
or
sudo -i
This opens a shell with root privileges.
Running Commands as Another User
To execute a command as a specific user:
sudo -u [username] [command]
Example:
sudo -u john whoami
This runs whoami as user john and displays the username being executed.
Differences Between sudo and su
| Command | Purpose | Required Password |
|---|---|---|
su [username] | Fully switch to another user | Target user’s password |
sudo [command] | Execute a command with temporary administrator access | Current user’s password |
sudo su | Switch to the root user | Current user’s password |
4-3. Switching Users in SSH Environments
When connected to a remote Ubuntu server via SSH, the GUI is not available. Therefore, switching users using CLI commands is mandatory.
Switching Users After SSH Login
First, connect to the server:
ssh [username]@[server IP]
Once logged in, switch users:
su [username]
Or switch to the root user:
su -
Switching Users with sudo in SSH
If your account has sudo privileges, you can switch users without knowing their password:
sudo -u [username] -s
This acts as a safer replacement for su.
Logging Into SSH Directly as a Different User
You can also log in directly as another user:
ssh [another user]@[server IP]
Example:
ssh john@192.168.1.100
4-4. Summary
sufully switches users but requires the target user’s passwordsudotemporarily grants administrator privileges without switching accountssudo suandsudo -iallow switching to the root user- In SSH environments,
suandsudo -uare essential tools for managing users
5. Managing Users in Ubuntu (Add, Delete, Modify)
Ubuntu allows you to add new users, delete unnecessary users, or modify existing user accounts. Proper user management is crucial when sharing a PC or managing servers with multiple users.
This section focuses on how to manage users using the Command Line Interface (CLI).
5-1. Adding a New User
Any user who belongs to the sudo group (administrator privileges) can create new user accounts.
Creating a User with the adduser Command
The most common way to create a new user is by using the adduser command.
Run the Command
sudo adduser [new-username]
Example:
sudo adduser john
What Happens Next
During user creation, you will be prompted to enter the following information:
- Password for the new user
- Optional user information (full name, phone number, etc.)
- Automatic creation of the home directory (
/home/[username]) - Placement of initial configuration files
Once completed, the account becomes available for login. 
Creating a User with the useradd Command
useradd can also be used to add users, but unlike adduser, it does not automatically create a home directory or set a password.
Run the Command
sudo useradd -m -s /bin/bash [new-username]
Example:
sudo useradd -m -s /bin/bash alex
Options:
-m: Create a home directory-s /bin/bash: Set the default shell tobash
To set the user’s password:
sudo passwd alex
Granting sudo Privileges to the New User
To allow the new user to use sudo privileges:
sudo usermod -aG sudo [username]
Example:
sudo usermod -aG sudo john
This command adds john to the sudo group, giving him administrator access.
5-2. Deleting a User
Removing unused accounts improves system security and reduces unnecessary resource consumption.
Deleting a User with deluser
To delete a user account:
sudo deluser [username]
Example:
sudo deluser john
This command deletes the account but keeps the user’s home directory.
Deleting a User with userdel
userdel provides more control over deletion operations.
Delete User and Home Directory
sudo userdel -r [username]
Example:
sudo userdel -r alex
This deletes the alex user and removes /home/alex/.
Important Notes When Deleting Users
- Back up the user’s home directory if needed
sudo tar -czf /backup/john_backup.tar.gz /home/john
- You cannot delete a user who is currently logged in
- If
johnis logged in,sudo deluser johnwill fail - If required, terminate user processes with:
killall -u [username]
5-3. Renaming a User
You can rename an existing user with the usermod command.
Changing the Username with usermod
Run the Command
sudo usermod -l [new-username] [current-username]
Example:
sudo usermod -l michael john
This changes john to michael.
Renaming the Home Directory
Changing a username does not automatically rename the home directory (/home/john remains intact). To rename it:
Rename the Home Directory
sudo mv /home/john /home/michael
Update the Home Directory Path
sudo usermod -d /home/michael -m michael
Important Notes When Renaming a User
- You cannot rename a user who is currently logged in
- If logged in as
john, the command will fail - Switch to root if necessary before renaming
- sudo group permissions may be affected
- Confirm the user remains in the sudo group:
sudo groupmems -g sudo -l
5-4. Summary
- Create new users easily with
adduser - Remove users with
deluser, or delete their home directory usinguserdel -r - Modify usernames via
usermod -land rename home directories accordingly - Always back up data before deleting or modifying user accounts
6. FAQ (Frequently Asked Questions)
Managing and switching users in Ubuntu is essential for many users, but it can sometimes be confusing. This section answers common questions and provides practical solutions.
6-1. What Is the Difference Between su and sudo? Which Should I Use?
Q: I don’t understand the difference between su and sudo. Which one should I use?
A: su fully switches to another user account, while sudo executes commands temporarily with administrator privileges.
| Command | Purpose | Required Password |
|---|---|---|
su [username] | Switch completely to another user | Target user’s password |
sudo [command] | Execute a command with temporary administrator privileges | Current user’s password |
sudo su | Switch to the root user | Current user’s password |
💡 Recommended: For security reasons, sudo is generally preferred over su.
6-2. Can I Switch Users in the GUI Without Entering a Password Every Time?
Q: My family shares a single Ubuntu PC. Is there a way to switch users without entering a password each time?
A: Yes. Enable automatic login to bypass password entry during login.
How to Enable Automatic Login
- Open the Settings application
- Select “Users”
- Enable “Automatic Login”
💡 Note: Automatic login can reduce security, so use caution when enabling it on shared or public systems.
6-3. How Can I Switch Users in SSH Without Using sudo?
Q: When connected via SSH, is there a way to switch users without using sudo?
A: Yes. You can use the runuser command as an alternative to su.
runuser -l [username] -c "command"
Example:
runuser -l john -c "whoami"
💡 This is useful for scripts where user switching is required.
6-4. Why Does “Authentication failure” Appear When Running su?
Q: When I run su, I get an “Authentication failure” error. What should I do?
A: su requires the password of the target user. Check the following:
- Is the password correct? (Check if Caps Lock is enabled)
- Is the target user account locked?
sudo passwd -S [username]
If the result shows L (locked), unlock it:
sudo passwd -u [username]
- Is
/etc/pam.d/suconfigured to restrict su?sudo nano /etc/pam.d/su
If the following line is uncommented, only users in the wheel group can run su:
auth required pam_wheel.so use_uid
6-5. Can I Recover Data After Deleting a User?
Q: I accidentally deleted a user. Can I recover the data?
A: If the user was removed using deluser or userdel without deleting the home directory, the data may still be available.
Check if the home directory still exists
ls /home/
If the home directory was deleted
Without a backup, full recovery is difficult, but you can try restoring using extundelete.
- Install extundelete
sudo apt install extundelete
- Scan and restore deleted files
sudo extundelete /dev/sdX --restore-all
Replace /dev/sdX with the correct partition (e.g., /dev/sda1).
💡 Important: Recovery is not guaranteed. Always create backups before deleting users.
6-6. Summary
- Understand the difference between
suandsudoand use them appropriately. - Enable automatic login to simplify GUI user switching (use carefully).
- Use
runuserorsudo -ufor switching users in SSH environments. - If
su: Authentication failureoccurs, check passwords and account status. - Deleted user data may be recoverable, but backups are the safest option.
7. Conclusion
In this article, we explored how to switch and manage users in Ubuntu using both GUI and CLI methods. Ubuntu is designed as a powerful multi‑user operating system, and by managing users properly, you can operate your system more efficiently and securely.
Below is a summary of the key points and best practices discussed in each section.
7-1. Fundamentals of User Switching in Ubuntu
- Ubuntu is a multi‑user system where each user operates independently.
- Understand the differences between standard users, administrator users (sudo), and the root user.
- User switching can be performed via the GUI or CLI.
7-2. Switching Users Using the GUI
- Lock screen switching keeps the current session active while you log into another user.
- Logging out ends the session completely and frees system memory.
- User Accounts settings allow administrative operations such as adding or managing users.
- Important: Save unsaved data and monitor memory usage when switching users.
7-3. Switching Users via the CLI
- Use
su [username]to switch users after entering the target user’s password. - Use
su -for a complete login environment, ensuring correct environment variables. - Use
sudo [command]for temporary administrator privileges. - In SSH environments, use
runuserorsudo -uto switch users securely.
7-4. Adding, Deleting, and Modifying Users
- New users can be added using
sudo adduser [username]. - Grant administrator privileges with
sudo usermod -aG sudo [username]. - Delete users with
sudo deluser [username]and remove their home directory usingsudo userdel -r [username]. - Rename users using
sudo usermod -l [new-name] [old-name]and update the home directory accordingly. - Always back up important data before making major changes.
Best Practices:
✅ Back up user data before deletion or modification
✅ Use administrator permissions responsibly
✅ Avoid unnecessary use of the root account
7-5. Summary of FAQ Topics
- Use
sudorather thansuwhenever possible for better security. - Automatic login simplifies GUI switching, but reduces security.
- SSH user switching can be done via
runuserorsudo -u. - Check passwords and account locks when authentication issues occur.
- Deleted data may be recoverable, but regular backups are the best defense.
7-6. Best Practices for User Management in Ubuntu
🔹 Granular Permission Control
- Separate standard and administrator permissions appropriately.
- Use
visudoto configure command‑specific sudo privileges when necessary.
🔹 Security‑Oriented Operations
- Avoid using the root account directly ; acquire privileges only when required.
- Be cautious with passwordless login or automatic login —especially on shared systems or servers.
- Remove unused users periodically to minimize risk.
🔹 Data Protection
- Back up home directories before modifying or deleting user accounts.
- Use
rsyncorcronfor scheduled, automated backups.
7-7. Final Thoughts
- Understand both GUI and CLI methods and use them according to your environment.
- Use su and sudo appropriately to prevent system misuse.
- Delete or modify users carefully to maintain a secure system.
- Adopt regular backup routines to protect against accidental data loss.
Ubuntu provides robust user management features that, when used correctly, enable secure, flexible, and efficient system operation. We hope this guide helps you understand and confidently manage user switching and administration in Ubuntu.